
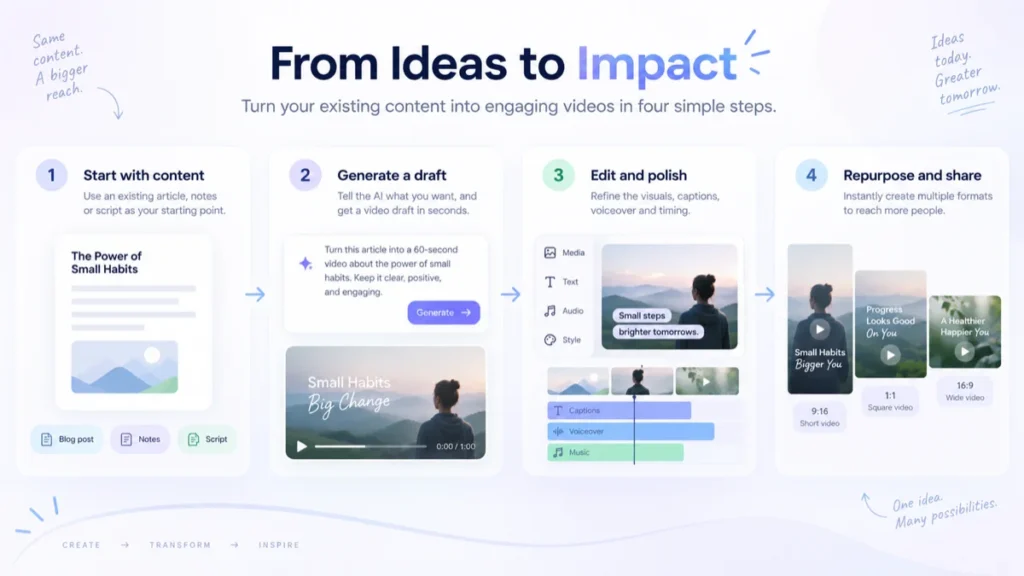
A blog post and a short video can carry the same idea, but they cannot use the same structure. An article can build context gradually. A short video has to establish relevance in a few seconds, keep moving, and make sense even when someone watches without sound.
The job is not to squeeze every paragraph into a minute. It is to choose one useful point, write it for speech, and design a sequence that supports the message instead of decorating it.
Quick answer: Choose one article with a clear practical outcome. Extract one story or lesson, reduce it to a short spoken script, plan the visuals, assemble a rough cut, add readable captions, and adapt the composition for each platform. Keep the article available as the deeper resource.
Choose an article worth repurposing
Start with an article that already answers a real question. Search traffic, support conversations, newsletter replies, and repeated client questions are better signals than personal attachment to the piece.
A good source article usually has at least one of these shapes:
- A short process
Three to five steps that can be demonstrated or illustrated. - A useful distinction
Two options that readers regularly confuse. - A specific mistake
One common error, its consequence, and a better method. - A compact checklist
A sequence viewers can save and use later.
A broad guide titled “Everything You Need to Know” may contain several videos, not one. Choose the section with the clearest standalone result.
Extract one clear story
Write one sentence that states what the viewer should understand or do after watching. If the sentence contains several promises joined by “and,” the concept is probably too wide.
Too broad
Learn how to plan meetings, capture notes, assign tasks, choose software, and improve team communication.
Focused
Turn every meeting decision into an action with one owner and one deadline.
The focused version gives the video a beginning, middle, and end. It also tells the editor what to remove.
Turn the article into a short script
Write for the ear. Sentences that look elegant on a page may be hard to follow when spoken once.
- Hook
Name the problem or desired outcome in the first line. - Context
Explain why the problem occurs in one or two sentences. - Core steps
Give no more than three or four actions. - Example
Show what one step looks like in practice. - Next action
Tell viewers what to check, save, try, or read next.
Read the script aloud at a calm pace. Remove phrases that only connect sections on a page. Replace long definitions with a concrete example. If the script feels rushed, cut an idea rather than accelerating the voice.
Example: article paragraph to video script
Article idea: Meeting follow-ups fail when tasks are written without an owner or deadline.
Short script:
“A meeting note is not an action item. Before the call ends, rewrite every task in one line: action, owner, deadline. ‘Update the pricing page’ becomes ‘Maya drafts the new pricing copy by Thursday.’ If no one owns the sentence, the meeting is not finished.”
The script keeps the principle, adds an example, and removes the surrounding explanation. The article can remain the destination for readers who need the complete workflow.
Select visual material before editing
Map each sentence to a visual purpose. Do not search for random footage after the voiceover is complete.
- Demonstration: show the action being performed.
- Evidence: show the relevant screen, chart, document, or result.
- Orientation: establish the person, place, or subject.
- Emphasis: use text or a close-up to reinforce one key phrase.
- Transition: move to the next step without introducing a new claim.
Use original screen recordings, approved brand assets, licensed stock, diagrams, or generated media that accurately represents the subject. A beautiful but misleading visual weakens the explanation.
Keep a simple source list beside the project. Record where each clip, image, sound, font, and quotation came from, plus any license or approval attached to it. This takes a few minutes during assembly and prevents a difficult search after the video has already been scheduled. If an asset has unclear rights, replace it before the final review rather than hoping its origin will not matter.
Create the first cut
You can assemble the draft in a traditional editor or use an AI-assisted platform. If you want generation, stock media, voice, and editing in one workflow, this overview explains when InVideo AI may be useful.
Whichever tool you choose, start with the script and a rough visual plan. Generate or assemble one version before experimenting with styles. Otherwise, each design choice becomes a new branch and the draft never stabilizes.
Treat an AI-generated video as an editable proposal. Check every factual statement, visual implication, caption, pronunciation, and brand element before publishing.
Cut pauses that do not help comprehension. Keep important text on screen long enough to read. Let a strong visual breathe instead of changing scenes only because a template suggests it.
Add captions and audio
Captions are part of the edit, not a final checkbox. Many viewers begin with sound off, and platform controls can cover text near the edges.
Review the transcript manually. Correct names, technical terms, numbers, punctuation, and line breaks. Keep each caption group short enough to read without pulling attention away from the visual.
For voiceover, listen on both headphones and an ordinary phone speaker. Music should support the pace without masking consonants. If the narration sounds rushed, shorten the script. Do not solve an overloaded idea by increasing playback speed.
Adapt the format for each platform
A vertical crop is not automatically a vertical edit. Reframe the subject, move captions into the safe area, and check whether the first visual still makes sense on a narrow screen.
- 9:16 vertical
Prioritize one subject, large captions, and central composition for short-form feeds. - 1:1 square
Useful for flexible feed placement, but verify that text does not crowd the shorter frame. - 16:9 wide
Allows supporting visuals and screen demonstrations, but avoid leaving the main subject too small.
Export a clean master for each required format. Repeatedly cropping an already compressed file reduces quality and makes future corrections harder.
QA checklist before publishing
- The first line states a clear reason to keep watching.
- The video communicates one main idea.
- Every factual claim matches the source article or an approved source.
- Names, numbers, captions, and pronunciation are correct.
- Visuals do not imply an unsupported product capability or result.
- Music remains below the voice on phone speakers.
- Captions remain inside platform safe zones.
- Licensed and approved assets are used.
- The final action is specific and matches the video.
- Vertical, square, and wide exports were checked separately.
A repeatable production template
- Source: paste the article URL and record its main reader outcome.
- Angle: choose one problem, comparison, process, or mistake.
- Script: hook, context, three steps, example, next action.
- Visual plan: assign a purpose and source to every scene.
- Draft: assemble one complete version before styling alternatives.
- Review: facts, captions, audio, rights, pacing, and safe zones.
- Adapt: prepare each required aspect ratio intentionally.
- Archive: store the script, project file, sources, and clean masters together.
Choose one published article now and write its single-sentence video promise. If that sentence is clear, the rest of the workflow has a stable starting point.
Sources and further reading
- YouTube Help: Create YouTube Shorts
- Instagram Help: Reels guidance
- W3C WAI: Captions for audio and video
Platform interfaces, recommended formats, and publishing controls can change. Check the current destination requirements before exporting a final campaign asset.